Step 6: Product Showcase and Images
What This Step Does
The Product step is where you decide whether the final video should include short clips of the creator physically showing the product packaging, and if so, how those clips should be set up.
There are two parts to this step:
- Product Showcase configuration. Off, Default 3, or Custom.
- Product image upload. Required only when showcase clips are on.
Pick the showcase mode first. The image upload changes based on the mode.
Product Showcase Modes
Three options at the top of the step:
- Off. No showcase clips. The creative is a single talking head video. The product stays mostly off screen. Use this when the message is the message and you do not need product handling footage.
- Default 3. The recommended starting point. Three preset clips, one in each setting: a counter shot, an indoor or home shot, and a car shot. Scene direction is pre populated for each clip.
- Custom. Full control over clip count, scene direction, duration per clip, and voice settings per clip. Use this when the default 3 clip pattern does not fit.
When to Pick Each
| If you... | Pick |
|---|---|
| Have a short message that does not need to show the product on camera | Off |
| Are running this campaign for the first time and want a fast clean output | Default 3 |
| Need more or fewer clips, different scene types, or specific scripted moments | Custom |
For a first creative, Default 3 is almost always the right choice. You can always rerun with Custom later if you learn the default does not match what you need.
Configuring Default 3
When you pick Default 3, the step expands to show three pre populated clip cards. Each one has a default scene direction and an empty spoken line field.
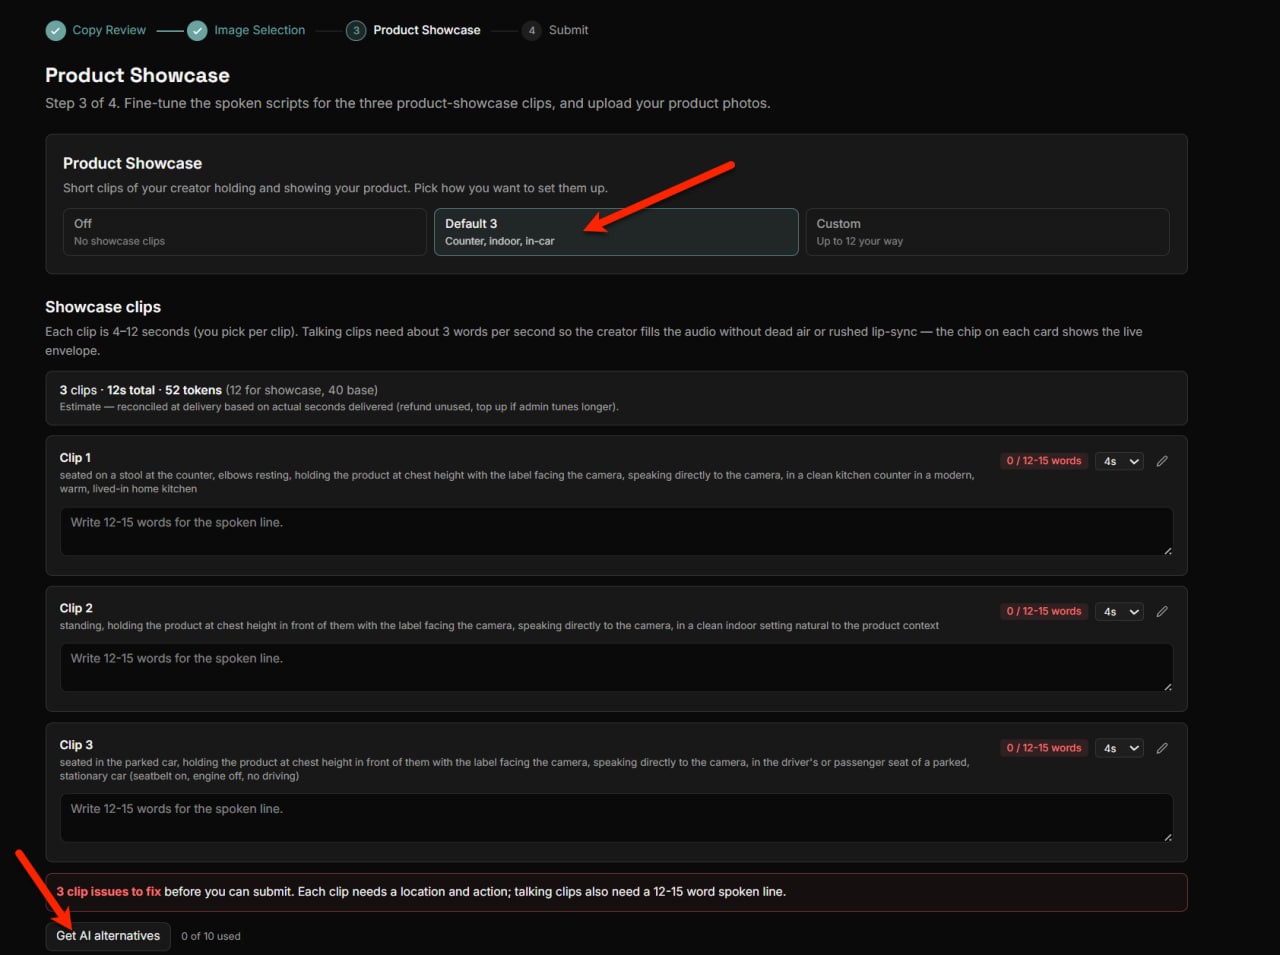
Three things to do per clip:
- Write the spoken line. Each clip is short. Aim for a concise CTA or a single product focused line. The platform shows the target word count (typically 12 to 15 words). Talking clips need roughly three words per second so the creator can deliver the line without dead air or rushed lips.
- Set the duration if needed. Most clips work at 4 seconds. You can change it per clip (4 to 12 seconds) if a particular line needs more room.
- Use Get AI alternatives. The button at the bottom generates baseline spoken lines for each clip. It is the fastest way to fill in defaults you can then edit.
For a first time submission, do not edit the default scene actions (where the creator is and how they are holding the product). The defaults are designed to be simple and clear. Custom scene direction is more powerful but requires more thought.
The chip at the top of the showcase section shows the running token estimate as you adjust durations. Estimates reconcile against actual produced seconds at delivery time, so treat the number as directional.
For deeper coverage of clip configuration, including the Custom mode controls and voice settings, see Configuring Product Showcase Clips.
Product Images
Product images are only needed when showcase clips are on. There are two kinds:
- Main product image. Required. The hero packaging shot the platform will reference for every showcase clip.
- Secondary product images. Optional. Scale references that help communicate handling and real world context.
The Main Image Standard
The most important asset in this entire flow is a clean main product image. Get this right and the showcase clips look professional. Get it wrong and every clip inherits the noise.
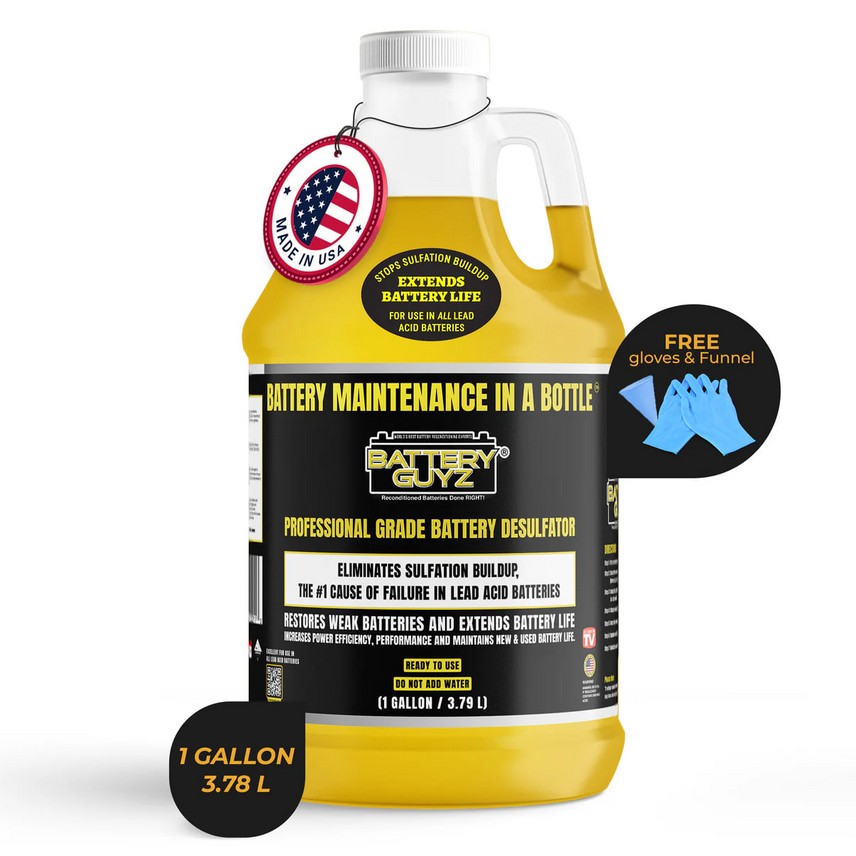
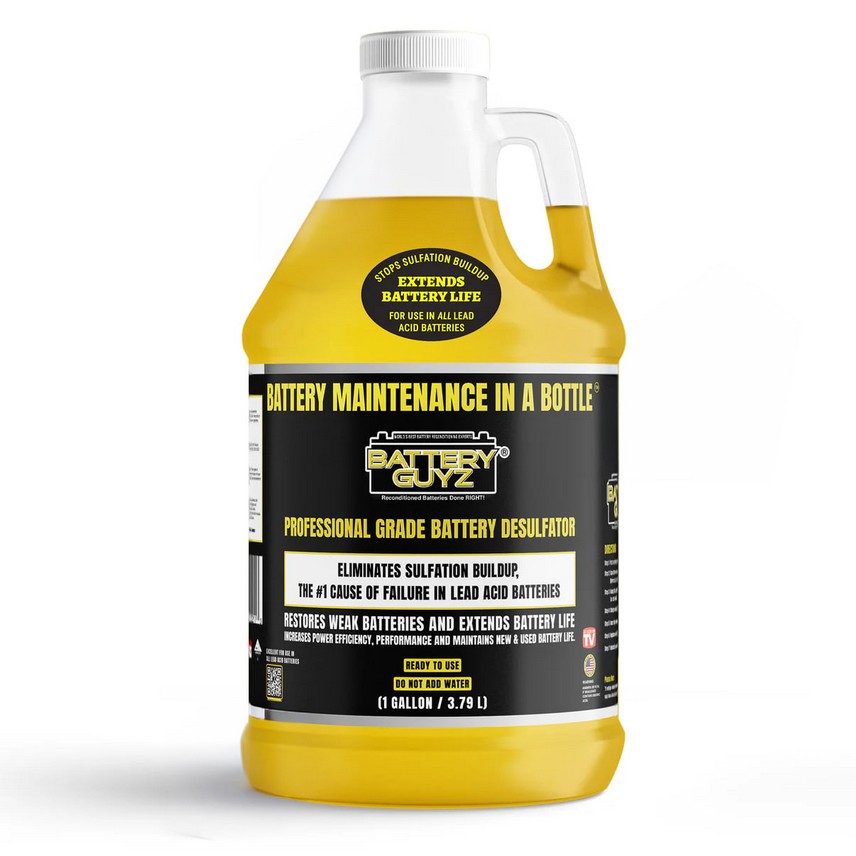
Upload a clean, high definition product packaging image with all the important label text readable. No extra tags, no decorative callouts, no unrelated props, no visual clutter.
If your source image has decorative tags, badges, pendants, or promotional overlays attached, have an editor clean it before uploading.
What This Looks Like
Two versions of the same product packaging. The first one has the kind of clutter you should remove before uploading. The second one is what the platform should see.
A few specific checks for the main image:
- Resolution is high. Label text is legible. No pixelation, no compression artifacts on the type.
- Background is plain. White or a single flat color is best. No props, no hands, no faces.
- The product matches the exact SKU. Same size, same packaging, same label as what will be advertised.
- No watermarks. Even faint vendor or supplier watermarks confuse the AI.
Secondary Images
Secondary images help the platform understand product scale and handling. Useful when the size, shape, or how a person holds the product is not obvious from the main image.
Three example scale shots for a battery product:
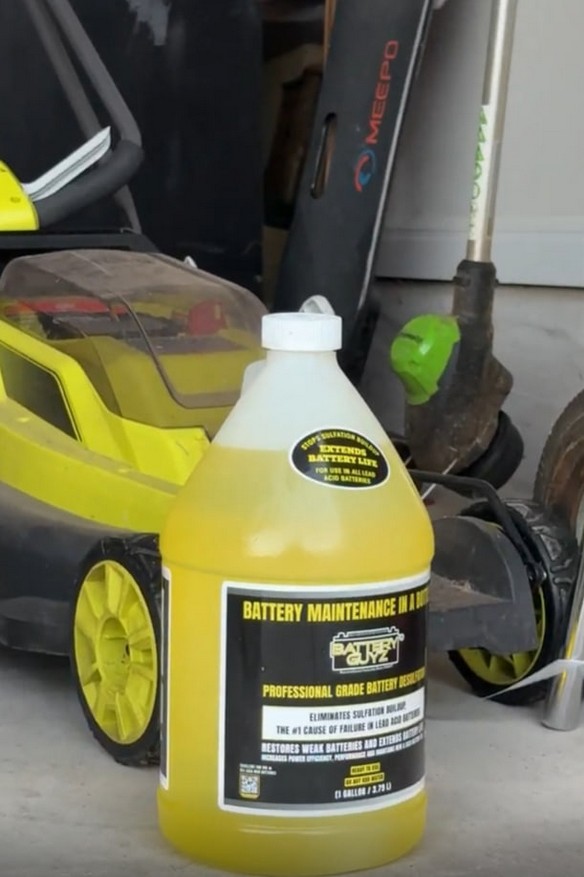
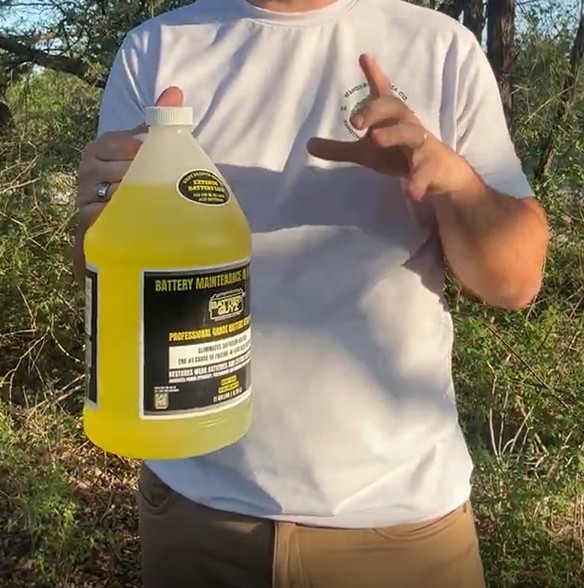
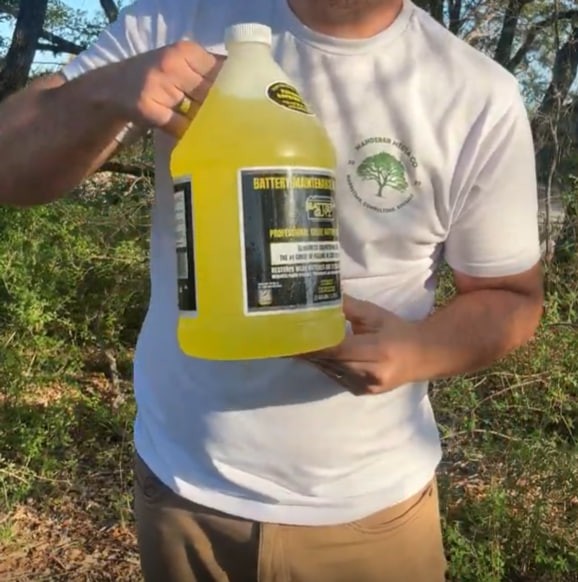
Keep secondary images simple. The point is scale, not branding. Avoid extra people, faces, other brand logos, or text that is not the product label itself.
Product Image Do and Do Not
A quick reference you can scan before uploading:
| Do | Do Not |
|---|---|
| Clean packaging with readable labels | Full faces or recognizable people |
| High resolution and sharp focus | Unrelated logos or third party brands |
| Simple backgrounds | Extra text, watermarks, badges, or pendants |
| Clear scale references in secondary shots | Low resolution or blurry labels |
| Images that match the exact SKU | Promotional overlays not part of the actual packaging |
For deeper coverage on where product images live across the broader product flow, see Uploading Product Images and Research URLs.
When You Are Done
When the showcase mode is chosen, every clip has a spoken line, and the main image (plus any secondary images) is uploaded, the Continue to Submit button at the bottom activates. Click it to move into the final step.
Previous: Copy review and persona · Next: Submit the creative
Related articles
Still need help?
Our team is ready to assist you. Get in touch and we will respond within 24 hours.
Contact Us