Step 2: Prepare the Brief
Why the Brief Matters
The brief is the single most influential input in this flow. Everything that comes after, from research synthesis to copy generation to persona casting, leans on what you write here. Spending an extra ten minutes on the brief saves an hour of revisions on the back end.
You have two parts to this step:
- Download the DOCX template, fill it in, and upload it.
- Review the brand standards the platform extracts and confirm them.
Download the Brief Template
When you land on the brief screen after creating the campaign, the recommended path is Upload your campaign brief. The recommended file format is the DOCX template, because its structure is the easiest for the platform to parse consistently.
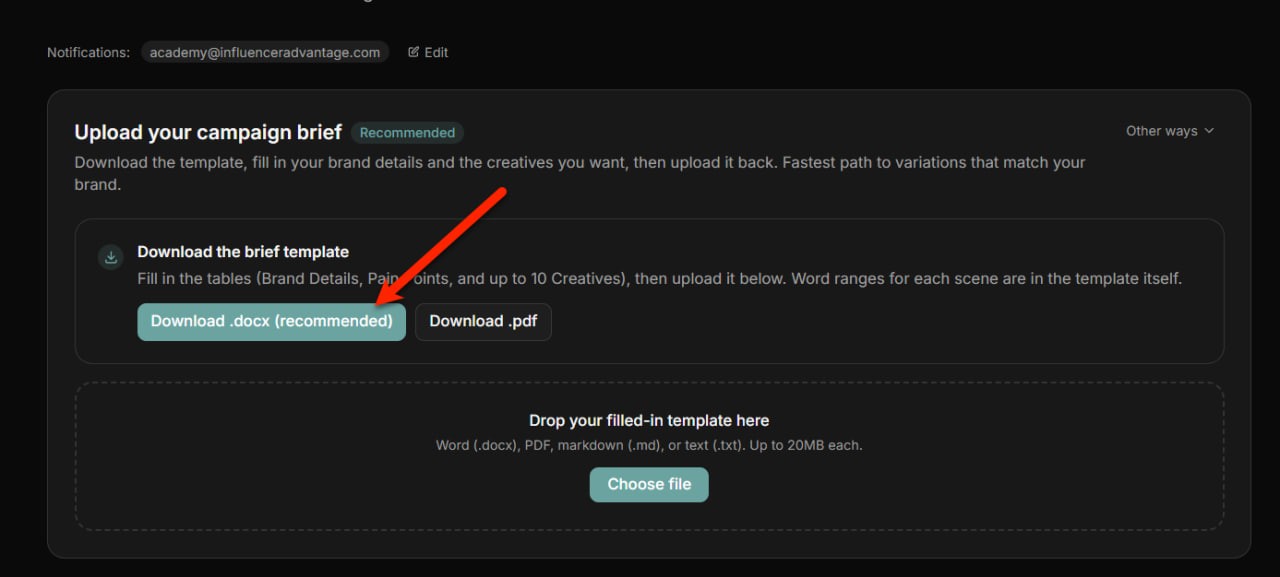
Click Download .docx (recommended) to grab the template, then open it in Word, Google Docs, or any editor that handles DOCX.
A PDF version is also available if your workflow needs it, but DOCX produces the most consistent extraction.
How to Fill the Brief
The template has three sections you fill in:
- Brand Details. Voice, audience, claims, prohibited content, copy style.
- Pain Points. The customer problem the product solves.
- Creatives. Up to 10 creative concept tables, each with a title, scenes, and the spoken copy.
A few rules of thumb that keep the output strong:
- Replace placeholder creative titles. Do not leave a creative titled "Your creative title." Make each one specific.
- Fill the brand details fields completely. Voice, audience, and claims drive every creative generated against this brief.
- Use the visual section as editor guidance. The platform reads it, but the spoken copy and brand standards have more weight on the final video.
- Write spoken copy as a person would say it. Conversational beats polished. One idea per scene whenever possible. Avoid dense product page paragraphs.
- Stay within the word ranges in the template. Going over is fine, the platform may shorten it, but clean source copy produces better outputs than cleanup.
- Trim concepts you do not need. The template has space for up to 10 creative concepts. If you only need 3, delete the tables for the other 7.
The Copy Framework
When you are unsure how to structure a creative, use this conversion friendly order:
| Scene | Purpose | Copy Guidance |
|---|---|---|
| Hook | Earn attention immediately | A relatable line, question, or emotional trigger. Avoid slow setup. |
| Scene 1 | Introduce context | Make the viewer feel seen. Keep it specific and human. |
| Scene 2 | Build credibility or texture | Explain what changed, what the product feels like, or why the issue matters. |
| Problem | Name the pain point | Clear and specific. Do not over explain. |
| Solution | Introduce the product benefit | Say what the product helps with, in approved language. |
| CTA | Tell the viewer what to do next | A direct simple action. Visit, try, shop, learn more, get started. |
The exact scene labels can vary between templates, but the logic is consistent: attention, situation, problem, product, action.
Upload the Filled Brief
Save your filled template. Back on the campaign workspace, drop it into the upload area or use Choose file. The accepted formats are Word, PDF, markdown, and text, with DOCX being the recommended choice.
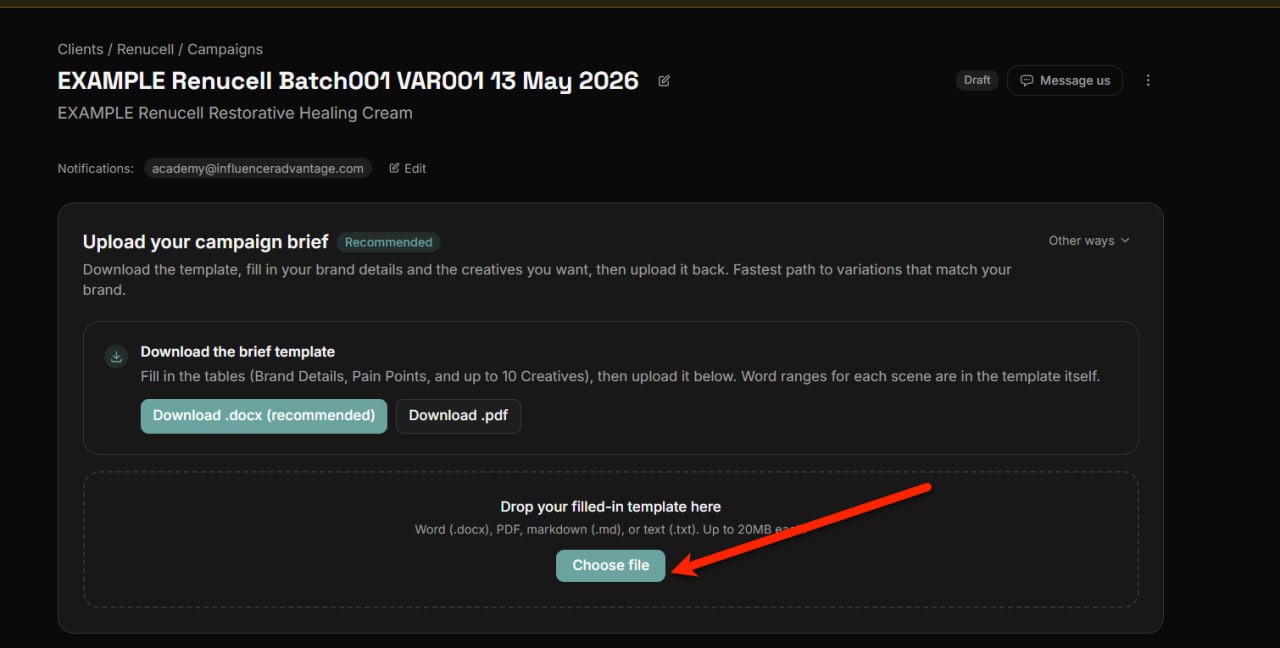
The platform processes the file in the background. It takes a few minutes. You can leave the page open or come back later. The workspace remembers where you are.
Review the Brand Standards
When processing completes, the platform extracts the brand standards from the brief and shows them in an editable panel. Review every field before you click Confirm. These standards apply to every creative the platform generates for this campaign.
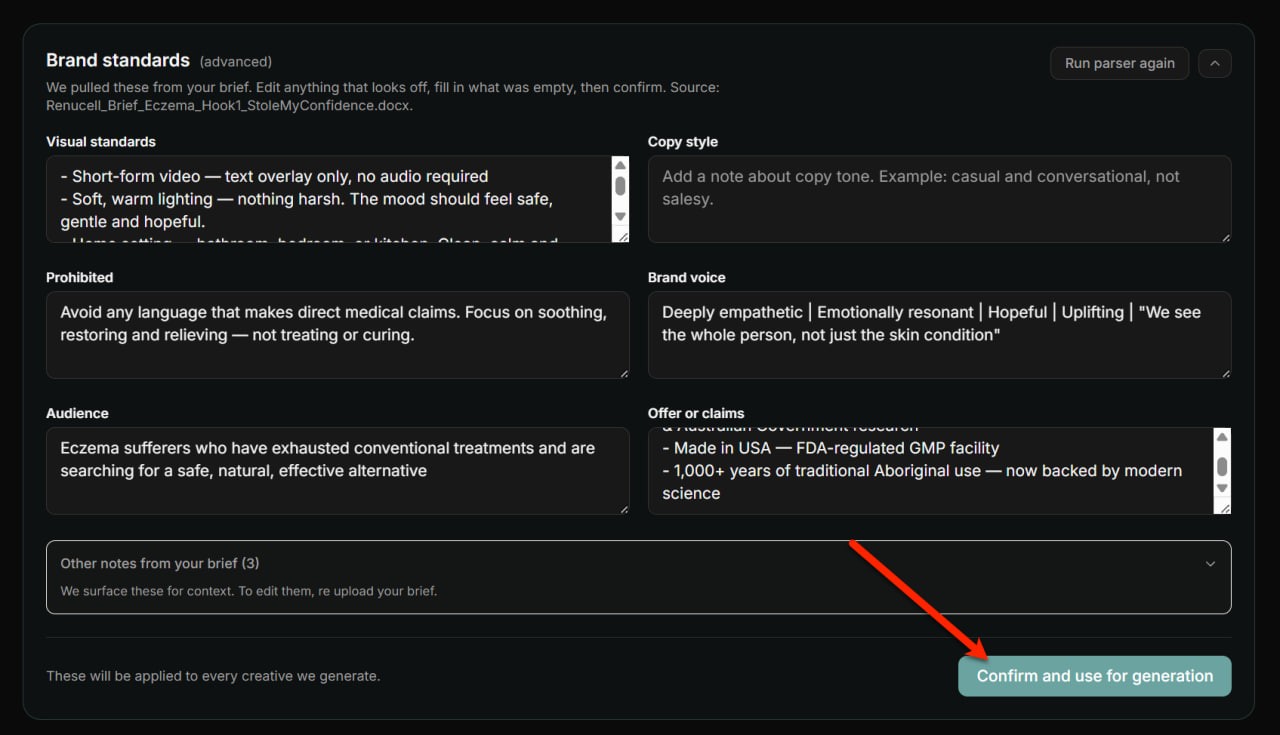
The six sections to review:
| Section | What to Check |
|---|---|
| Visual standards | Confirms the visual direction. Watch for anything that conflicts with talking head UGC. |
| Copy style | Tone notes: casual, empathetic, premium, direct, humorous, not salesy. |
| Prohibited content | Anything that must never appear. Tighten if the extract is too vague, add anything that must be excluded. |
| Brand voice | The persona the brand sounds like. Edit if it does not match. |
| Audience | The target buyer or viewer profile. |
| Offer or claims | Read every claim carefully. Only approve claims the brand is comfortable using in creative output. |
If something is wrong, edit it in place. The fields are free text. If the extraction missed entire sections, use Run parser again at the top to retry.
When everything reads right, click Confirm and use for generation.
Do not skip this review. Correcting bad brand standards now takes thirty seconds. Correcting them after generation means redoing one or more creatives. The math always favors fixing them here.
- Writing Effective Product Descriptions and Dialogue goes deeper on the three places brand and product copy live.
- Inside the Campaign Research covers what happens with your inputs after this step.
Previous: Create your campaign · Next: Run discovery
Related articles
Still need help?
Our team is ready to assist you. Get in touch and we will respond within 24 hours.
Contact Us