Step 1: Create Your Campaign
Log In and Pick the Right Client
Sign in at realitymold.com/login with your workspace credentials. On the dashboard, find the client this campaign belongs to under Recent Clients and open it. If the client is not in the list, use the Clients entry in the left sidebar and find it from the full list.
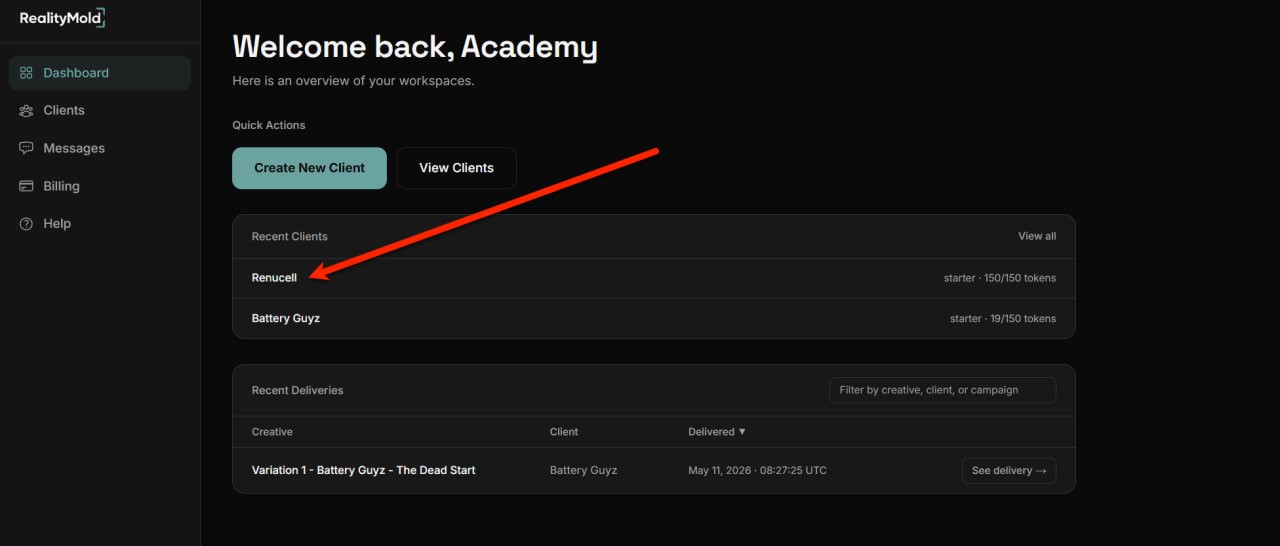
Why this matters. Every campaign lives inside a client workspace. Campaigns, deliveries, the persona library, notifications, and credit balance are all scoped to the client. Creating a campaign under the wrong client puts assets in the wrong place and the only fix is recreating it.
When in doubt, confirm the client name in the breadcrumb at the top of the page before you click Create Campaign.
Open the New Campaign Form
Inside the client workspace, find Create Campaign (or open an existing campaign list and click the button at the top). The New Campaign form opens.
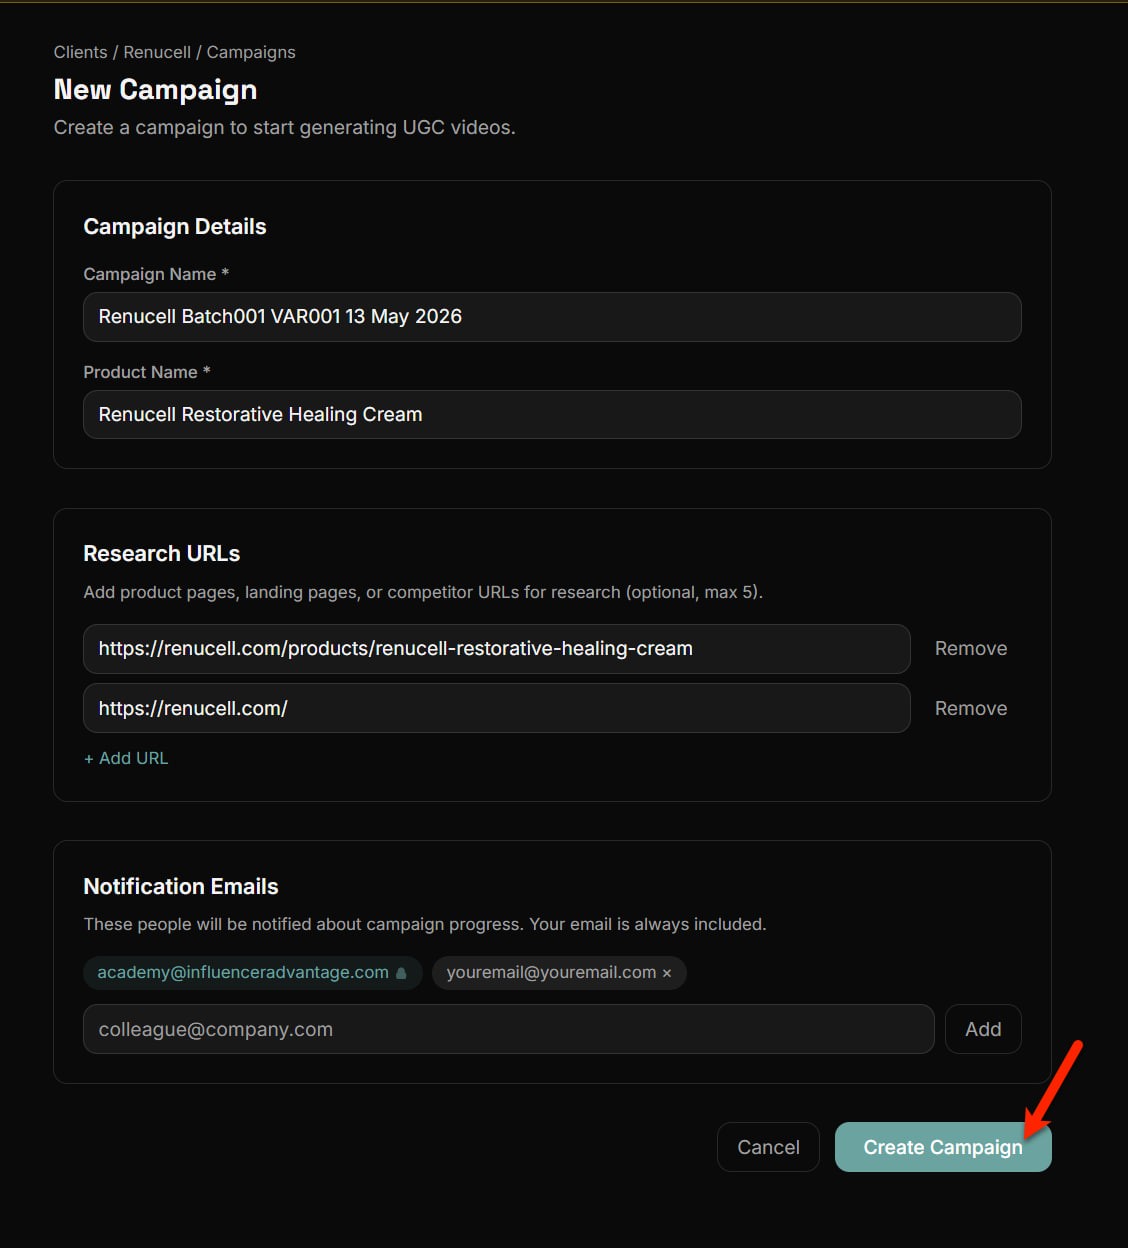
The form has four sections. Each one shapes a different part of how the platform handles the campaign downstream.
Campaign Name
The campaign name is how you will find this campaign later, so make it specific. A repeatable naming convention helps when you are managing many campaigns across many clients.
A pattern that works:
BrandOrProduct Batch001 VAR001 13 May 2026
Breaking it down:
- Brand or product name. So you can scan a long list of campaigns and tell what each one is.
- Batch number. Useful when you run several creative batches for the same brand.
- Variation number. When the brief has multiple angles you want to track separately.
- Date. Anchors the campaign in time. Helpful for monthly retros and pacing.
You can change the name later if you need to. The platform does not enforce a format. The recommendation above is just one that scales.
Product Name
Write the product name the way a creator should say it on camera. Avoid:
- Internal abbreviations.
- Unnatural punctuation or symbols.
- Wording that would sound awkward read aloud.
The AI uses this name in the spoken copy. If you write "ACME Pro X (v2.1)" the persona will try to say all of that. "ACME Pro" reads naturally.
Research URLs
Add the URLs you want the platform to learn from. The form accepts up to 5 URLs. The recommendation is at least 1 URL and usually no more than 4 strong URLs. More is not always better.
A strong starter set:
- The primary product page.
- The brand or product home page.
- Optional: FAQ, ingredient, claims support, reviews, or landing pages only if they are relevant to this specific creative.
Avoid:
- Unrelated pages from other products on the same brand.
- Duplicate pages that say the same thing.
- Pages that could introduce off brand claims or wording you do not want the AI to pick up.
You can refine this list further in the discovery step before generation actually starts.
Notification Emails
Add every email address that should get progress updates and delivery emails for this campaign. Your own email is included automatically. You cannot remove yourself.
Common patterns:
- Solo brand owner. Just you. No additions needed.
- Agency with a client contact. Add the client's primary contact so they see deliveries the moment they land.
- Team with multiple reviewers. Add every reviewer.
There is no fixed cap on the list. Add as many recipients as the work actually requires. The full set of behaviors around notification emails is documented in Managing Notification Emails on a Campaign.
Click Create Campaign
When all four sections look right, click Create Campaign. The workspace opens to the brief upload screen, which is where the next step picks up.
- Creating Your First Campaign covers the same flow from a Getting Started angle.
- Managing Notification Emails on a Campaign goes deeper on the recipients list.
Previous: Overview · Next: Prepare the brief
Related articles
Still need help?
Our team is ready to assist you. Get in touch and we will respond within 24 hours.
Contact Us