Step 5: Copy Review and Persona Selection
What This Step Does
Once you click Continue on a creative from the campaign page, you land inside the creative workspace. Two things happen here before you move on to product setup:
- Copy Review. Confirm or edit the spoken copy for every scene.
- Image Selection. Pick three persona candidates for the on camera presenter.
Both feed directly into the final video. Get them right and the production team has clear direction. Skip them or rush them and the final video has to do guesswork.
Copy Review
The Copy Review step shows every scene side by side with the source line from your brief and the platform's revised final copy. When the platform changed a line, it explains why in a "Why we changed it" note.
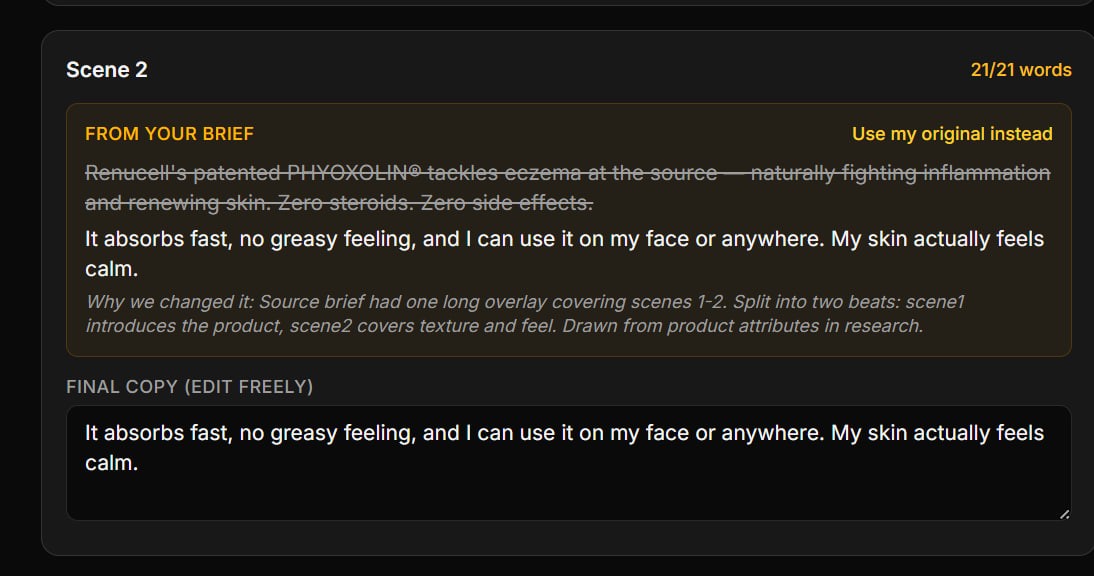
You have three controls per scene:
- Edit the final copy directly. The text field accepts any wording you want.
- Use my original instead. Reverts to the line from the brief, ignoring the platform's revision.
- Leave it as is. Move on if the revised copy sounds right.
What Good Spoken Copy Sounds Like
The goal is not to preserve every sentence from the brief. The goal is text a real person can say naturally while staying on brand and within length.
A good scene line is:
- Short enough to say comfortably on camera.
- Clear, direct, and conversational.
- One idea per scene whenever possible.
- Free of dense technical wording and unsupported claims.
The word counter on the top right of each scene shows how much room you have. Going over does not always block submission, but tight copy delivers cleaner audio in the final video.
When every scene reads right, continue to the persona step.
Image Selection
The Image Selection step asks you to pick three persona candidates. The production team uses these three to choose the actual presenter for your video. You provide the direction; they make the final call from the three you submit.
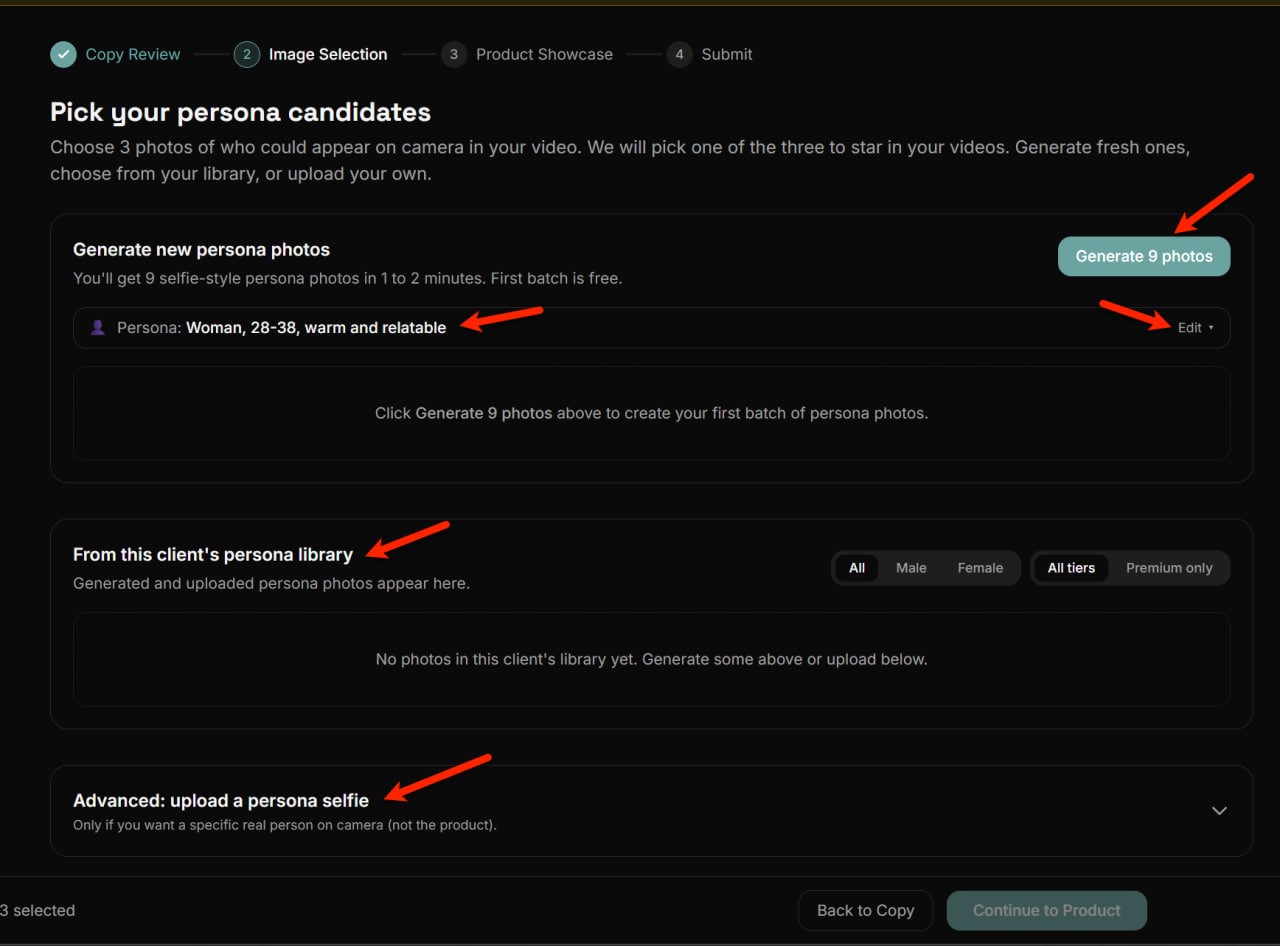
You have three ways to assemble candidates:
Generate New Persona Photos
Click Generate 9 photos. The platform produces a fresh batch of nine selfie style persona photos in 1 to 2 minutes. The persona description at the top (gender, age range, vibe) drives the look.
If the suggested persona description does not fit your brand, click Edit to adjust gender, age range, personality, additional notes, or style chips before generating. Every generated photo also lands in this client's persona library so you can reuse it on future creatives.
The first batch on a creative is free. Subsequent batches may use tokens. See Generating Persona Images for the full pricing logic.
From This Client's Persona Library
Every photo you have ever generated or uploaded for this client appears in the library section. Use the All / Male / Female filter and the All tiers / Premium only filter to narrow down. Click a photo to add it as a candidate.
Reusing library photos on multiple creatives costs nothing and gives you a consistent look across a brand's videos. See Working with the Persona Library for deeper coverage.
Advanced: Upload a Persona Selfie
If your campaign needs a specific real person on camera (an existing brand ambassador, the founder, a returning creator), expand the Advanced: upload a persona selfie section and upload a photo of that person. The platform uses it as the casting anchor.
Only use this when you actually need that specific person. For everything else, generated photos or library photos give the team more flexibility.
Select Three Candidates in Priority Order
Pick exactly three persona images. Order matters. Place them so:
- The first selected is your top choice.
- The third selected is the fallback if the first two cannot be produced.
The selected count chip at the bottom of the page shows your progress. When it reads 3/3 selected, the Continue to Product button activates.
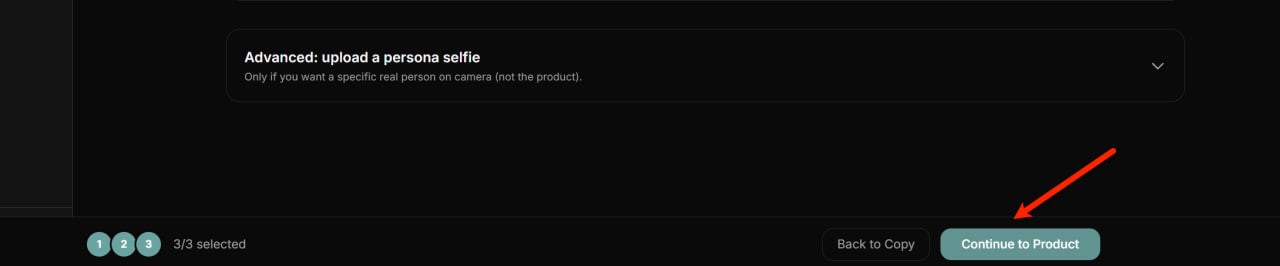
Click Continue to Product to move to the next step.
- Editing Dialogue and Hooks goes deeper on the Copy Review step, including hook patterns that perform well.
- Working with the Persona Library covers how the library accumulates and how to filter it.
- Generating Persona Images covers the batch generation flow in detail.
- How Persona and Actor Direction Work explains the persona drawer fields that shape the look.
Previous: Approve creative variations · Next: Product showcase and images
Related articles
Still need help?
Our team is ready to assist you. Get in touch and we will respond within 24 hours.
Contact Us